Valve Cover Gaskets on a Rocket 350
Many of the people who read this blog on a regular basis know that I have recently come back into ownership of the 1977 Oldsmobile Cutlass Supreme that I let my friend Dan drive for a short period of time last winter when he needed a reliable vehicle. But up until now, nothing has ever been said of the huge oil leak the car had. Not because of any serious internal problems, however, but because of the fact that a common problem with later Oldsmobile 350's is that the valve covers are only held down with five bolts. That's right; two on the top and three on the bottom. As a result of this, they tend to loosen (I was able to remove the bolts on the back corners of both covers with just my fingers) and leak over time, allowing oil to run down onto the exhaust manifolds and creating a wonderful layer of sludge on just about every surface in the area. When Dan had the car, he bought the valve cover gaskets for it, but never got around to fixing the problem, instead choosing to simply put a quart of oil in it every time he drove it and dealing with the smell. Now that I have the car back, it's time to fix it for good.
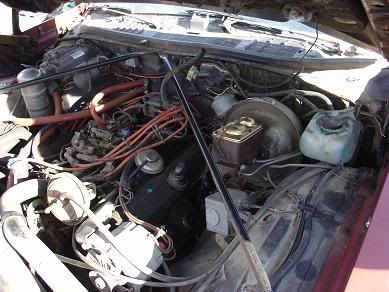
So here we are, ready to pull the cover on the driver's side. The air cleaner and snorkel have been removed, and the spark plug wires have all been pulled off of the plugs and moved out of the way to allow for an area as unobstructed as possible. The stovepipe from the exhaust manifold to the snorkel is off and all five valve cover bolts are out. The spot of General Motors blue on the top of the cover I exposed with my finger shows you what potential lies underneath the thick layer of dirt and oil on them. I apologize for not having pictures of what it looked like with the cover on this side off, or for the reinstallation, but I was scrambling to get it finished before what little daylight I had left was gone; I still had the other side to do, and anybody who has experience with older GM cars knows what a joy their ridiculously elaborate air conditioning compressor bracket system can be.
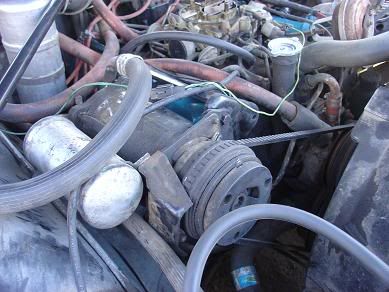
Ah yes, that wonderful General Motors air conditioning compressor. If the back portion of the bracket that holds it in place was a half inch forward or back from where it actually was, I wouldn't have to take it all apart and move it out of the way. But since it runs across the indentation in the top of the valve cover where you have to put your socket wrench to get out the last remaining bolt in the cover, apart it comes. All 496 pieces of it. Undo the two tensioner bolts on the front and back, the bolt on the intake manifold, the two bolts that hold the front of the bracket to the cylinder head, the one that holds the back portion of the bracket to the top of the block, and the two bolts on the top of the thing that hold all those different pieces straight and together, and you're in. You can now successfully move the AC compressor out of the way, remove the last bolt, and pull the cover.
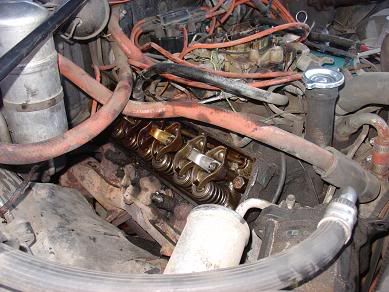
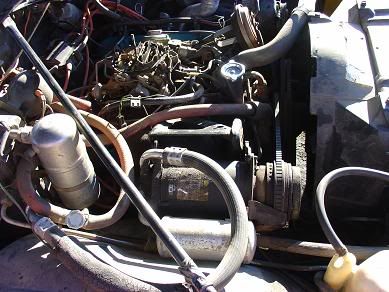
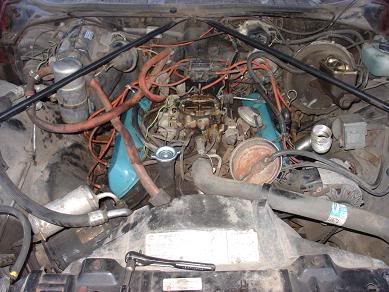
Doesn't look half bad in there for probably 20 years of oil burnoff. All the rocker arms on both sides were nice and tight and everything was pretty clean. Note the AC compressor in the foreground of the picture is now resting down in front of the inner wheel apron.
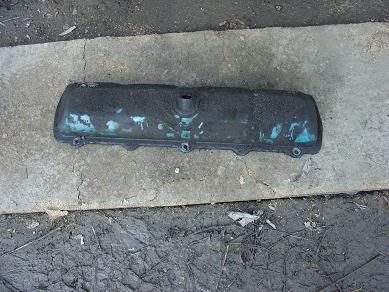
As stated before, both valve covers were pretty well covered with sludge before. Both of them cleaned up very well, though; the one for the driver's side still had the timing stamp it left the factory with on it under all the grease and dirt.
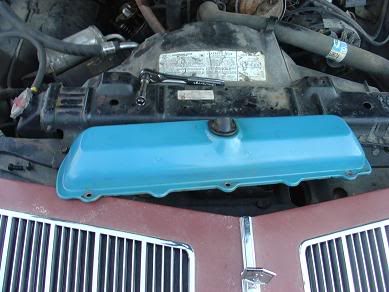
Showing the nice original coat of General Motors blue that was under all the sludge, the valve cover is now ready to be put back on the top of the cylinder head with a new gasket and a good bead of RTV gasket sealant on both sides.
Now that both covers are back on the engine with new gaskets and torqued down properly, it's time to put the air conditioning compressor back into place. Since it weighs about a million pounds and the bracket has to be put back together sort of loosely and then tightened up once the compressor's in place, it's a good idea to have an extra set of hands around. Because I'm an idiot, however, I did it myself. I'm almost positive it would go a lot faster and smoother if someone was holding the damn thing for you, though. Hindsight is always 20/20.
Once it's all back into place and the belt is tensioned properly, you're pretty much done. Put your air cleaner and snorkel back on and fire it up. I let the car get up to operating temperature and there were no leaks anywhere. There was about a minute of residual oil burnoff but that was it. I took it for a nice long ride and upon returning home, opened the hood to see absolutely no smoke and the oil level at exactly where it had been before I left. Pretty soon she'll be ready for a trip to the exhaust shop.
posted by Mac @ 4:29 PM
4 comments
![]()
